Are you still troubled with how to style natural 4C hair in the coming summer? In fact, there are unlimited possibilities with natural curly hair. Hairstyling is usually the finishing touch of the overall look. Do it casually or prepare carefully? Modest or flamboyant? Pursuing comfort, convenience, or a chic style? If you're concerned about having shorter or thinner hair, using afro kinky curly or corase Kinky clip in hair extensions,braiding human hair or a drawstring ponytail hair extensions can easily help you achieve your ideal ponytail look. Read on in this article, and choosing the perfect hairstyle will no longer be an annoying trifle!
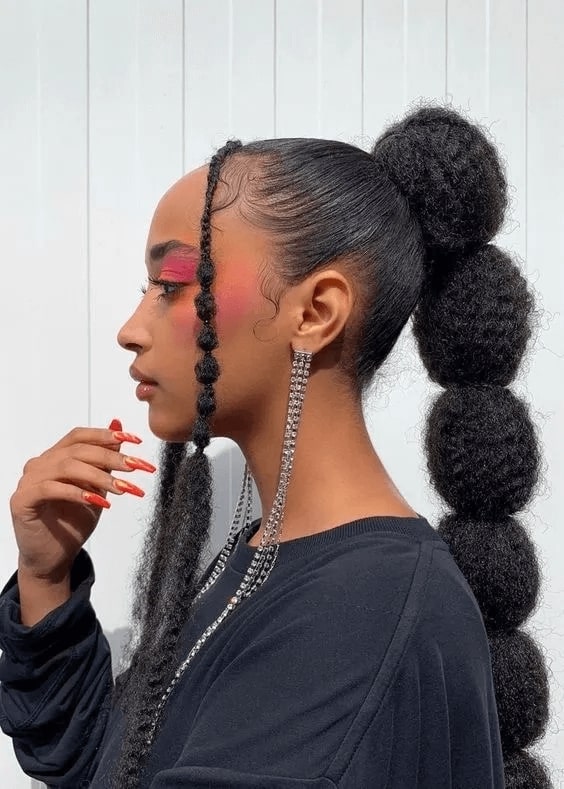
What Are the Best Hairstyles for Women Based on Face Shape?
No matter what consequences you are going to take into consideration, all your need can be satisfied with HIGH PONYTAIL HAIRSTYLES.
High ponytail is always the most prevalent hairstyle in natural community and has been one of the most ordinary hairstyles on the street for decades.
As a daily style, it is simple and versatile; as event style, it's decent and elegant. High braided ponytail can maintain for weeks so you don’t have to take time to make your hairstyle every day.
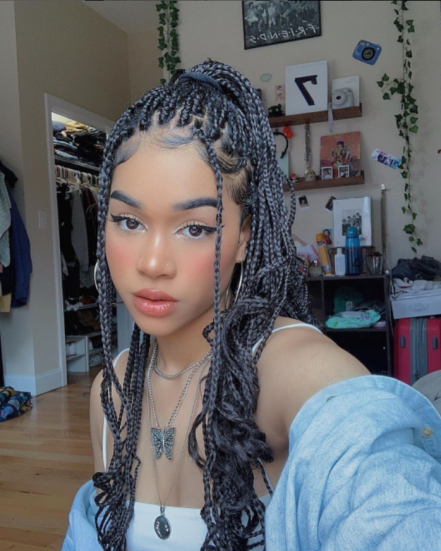
For ladies who want to have fashionable look, it is also a quintessential option to show your personality vividly and publicize the beauty of women.
No matter you are going to take part in daily date, party, traveling or atten some formal occasions, different types and styles of high ponytails can make you the brightest guy and attract all attention.
Nevertheless, how to make out the best high ponytail hairstyle from so quite a few hairtyles?
Don't be so indecisive. There are thousands of hairstyles which have been created since long long ago, and here are few tips for you to choose the right hairstyle which suits you best.
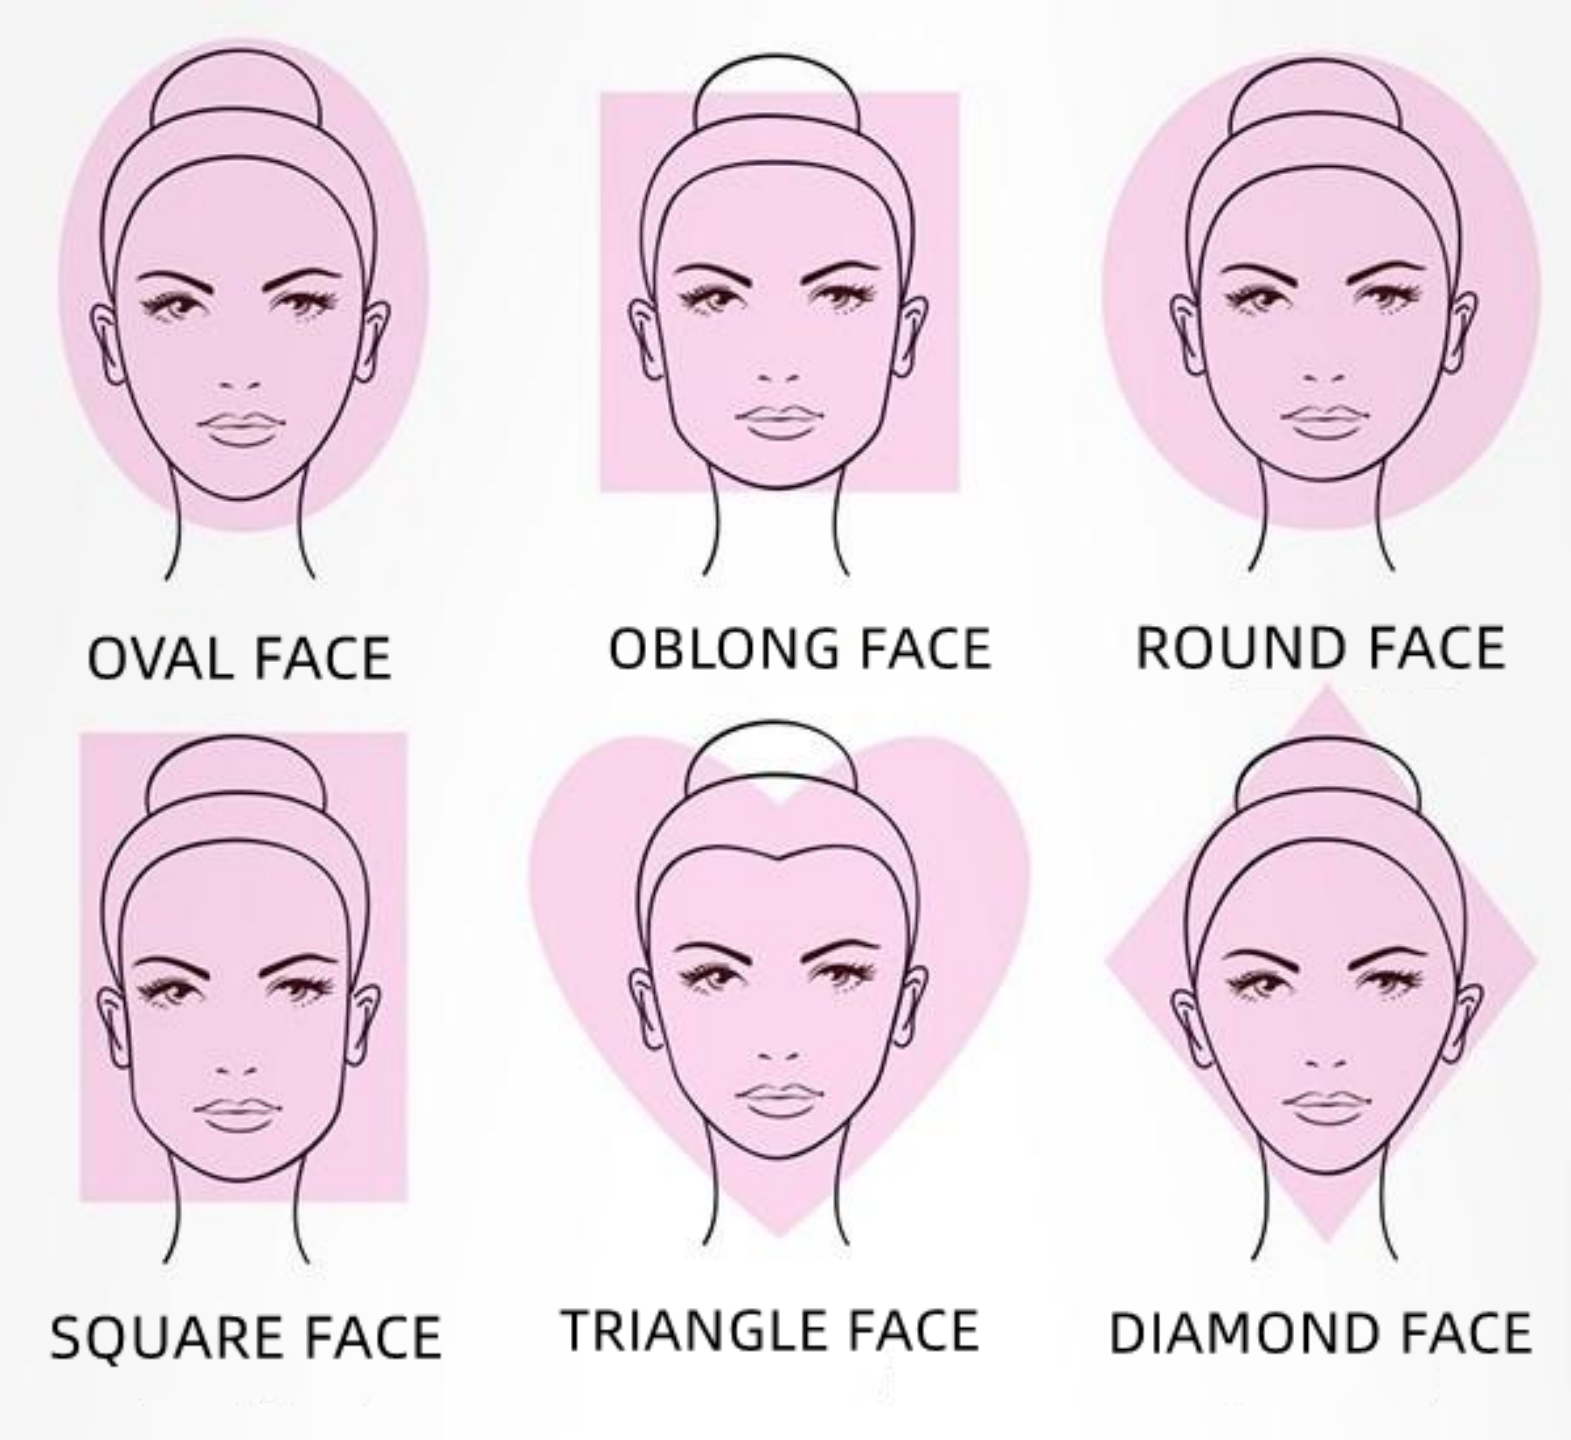
- Oval face: You can sweep your hair back and fully expose your face. Avoid long bangs which will make your face look rounder than it is actually.
- Round face: Create side parts to make your face look longer. Avoid the haircuts with full bangs or parting the hair down the middle.
- Oblong face: Try short hair on the sides to make your face look much longer.
- Square face: The buzzcut, undercut and fades will look perfect.
- Diamond or triangle face shape: Make shorter hair on the sides and longer on the top. Avoid chin-length hairdo
Here are the TOP 10 best high ponytail hairstyles that we recommend for you with natural 4b4c hair.
1.Bouncy High Curly Ponytail
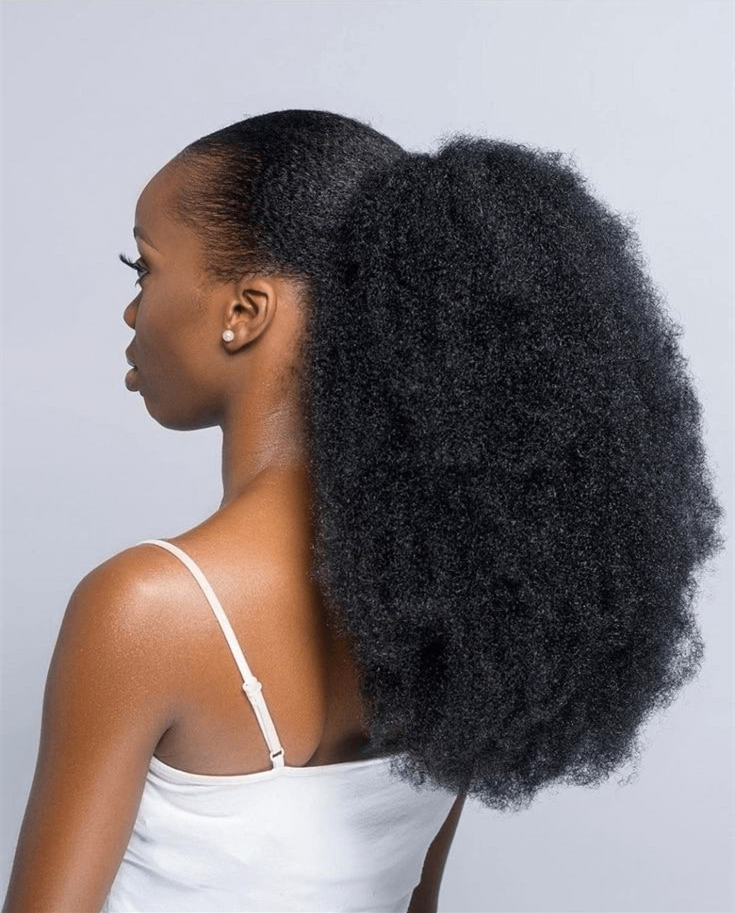
Simple guide for making high curly ponytail
For styling long natural 4c hair:
- Wash your hair and dry it out.
- Detangle all your curls to get a smooth top knot ponytail
- Brush all your hair upwards and tight your ponytail with hair ties
For styling short hair with extensions:
- Braid your hair into a little bun
- Wrap your front head around with a scarf
- Take out clip in hair extensions or drawstring ponytail and wrap it around your natural bun,pull the string and make sure it’s tight enough.
- Take a piece out and wrap it around your ponytail to cover the tracks
- Use the wide tooth comb to fluff it out
2.High Sleek Blowout Ponytail
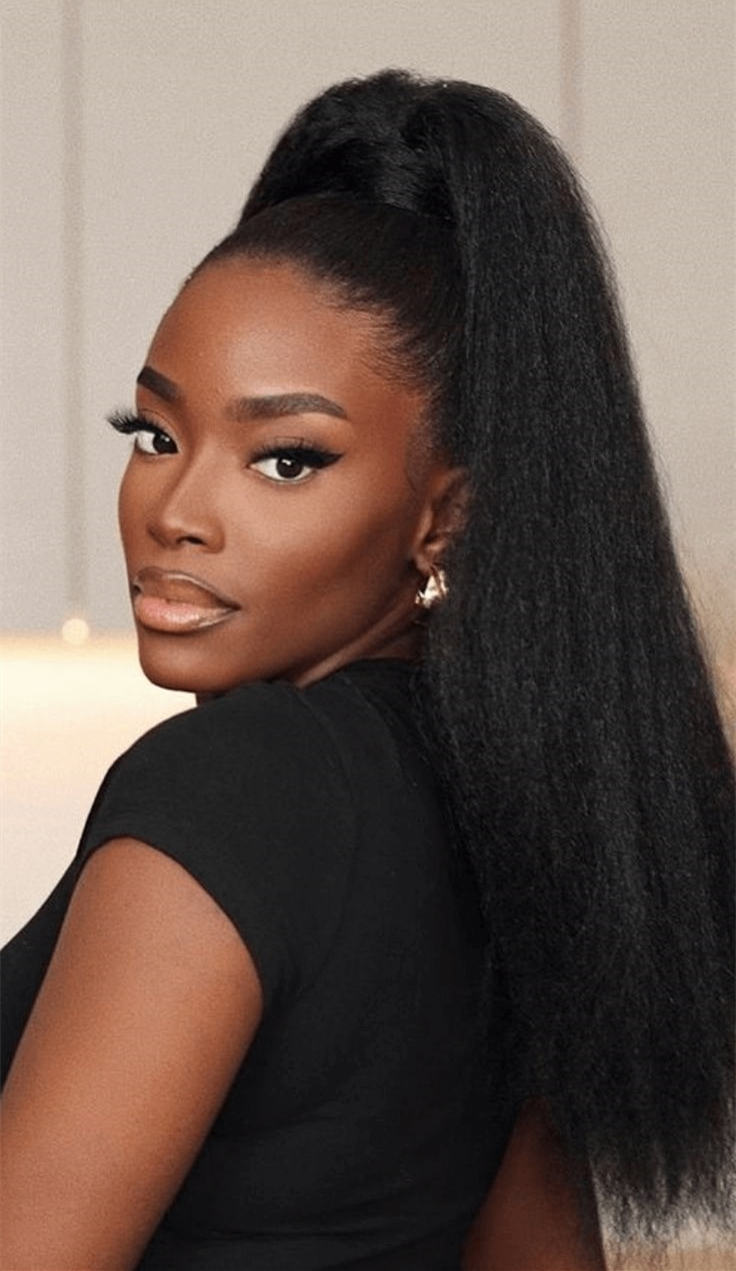
What should be prepared for making high sleek blow out ponytail
- Coconut oil
- Nature finishing oil
- Heat protectant(Any brand you like)
- Rat tail comb
- Hair drier
- Freezing spray
- Rubber bands
- Satin Scarf
- Coarse kinky or Light Yaki clip ins,weave hair or drawstring ponytail
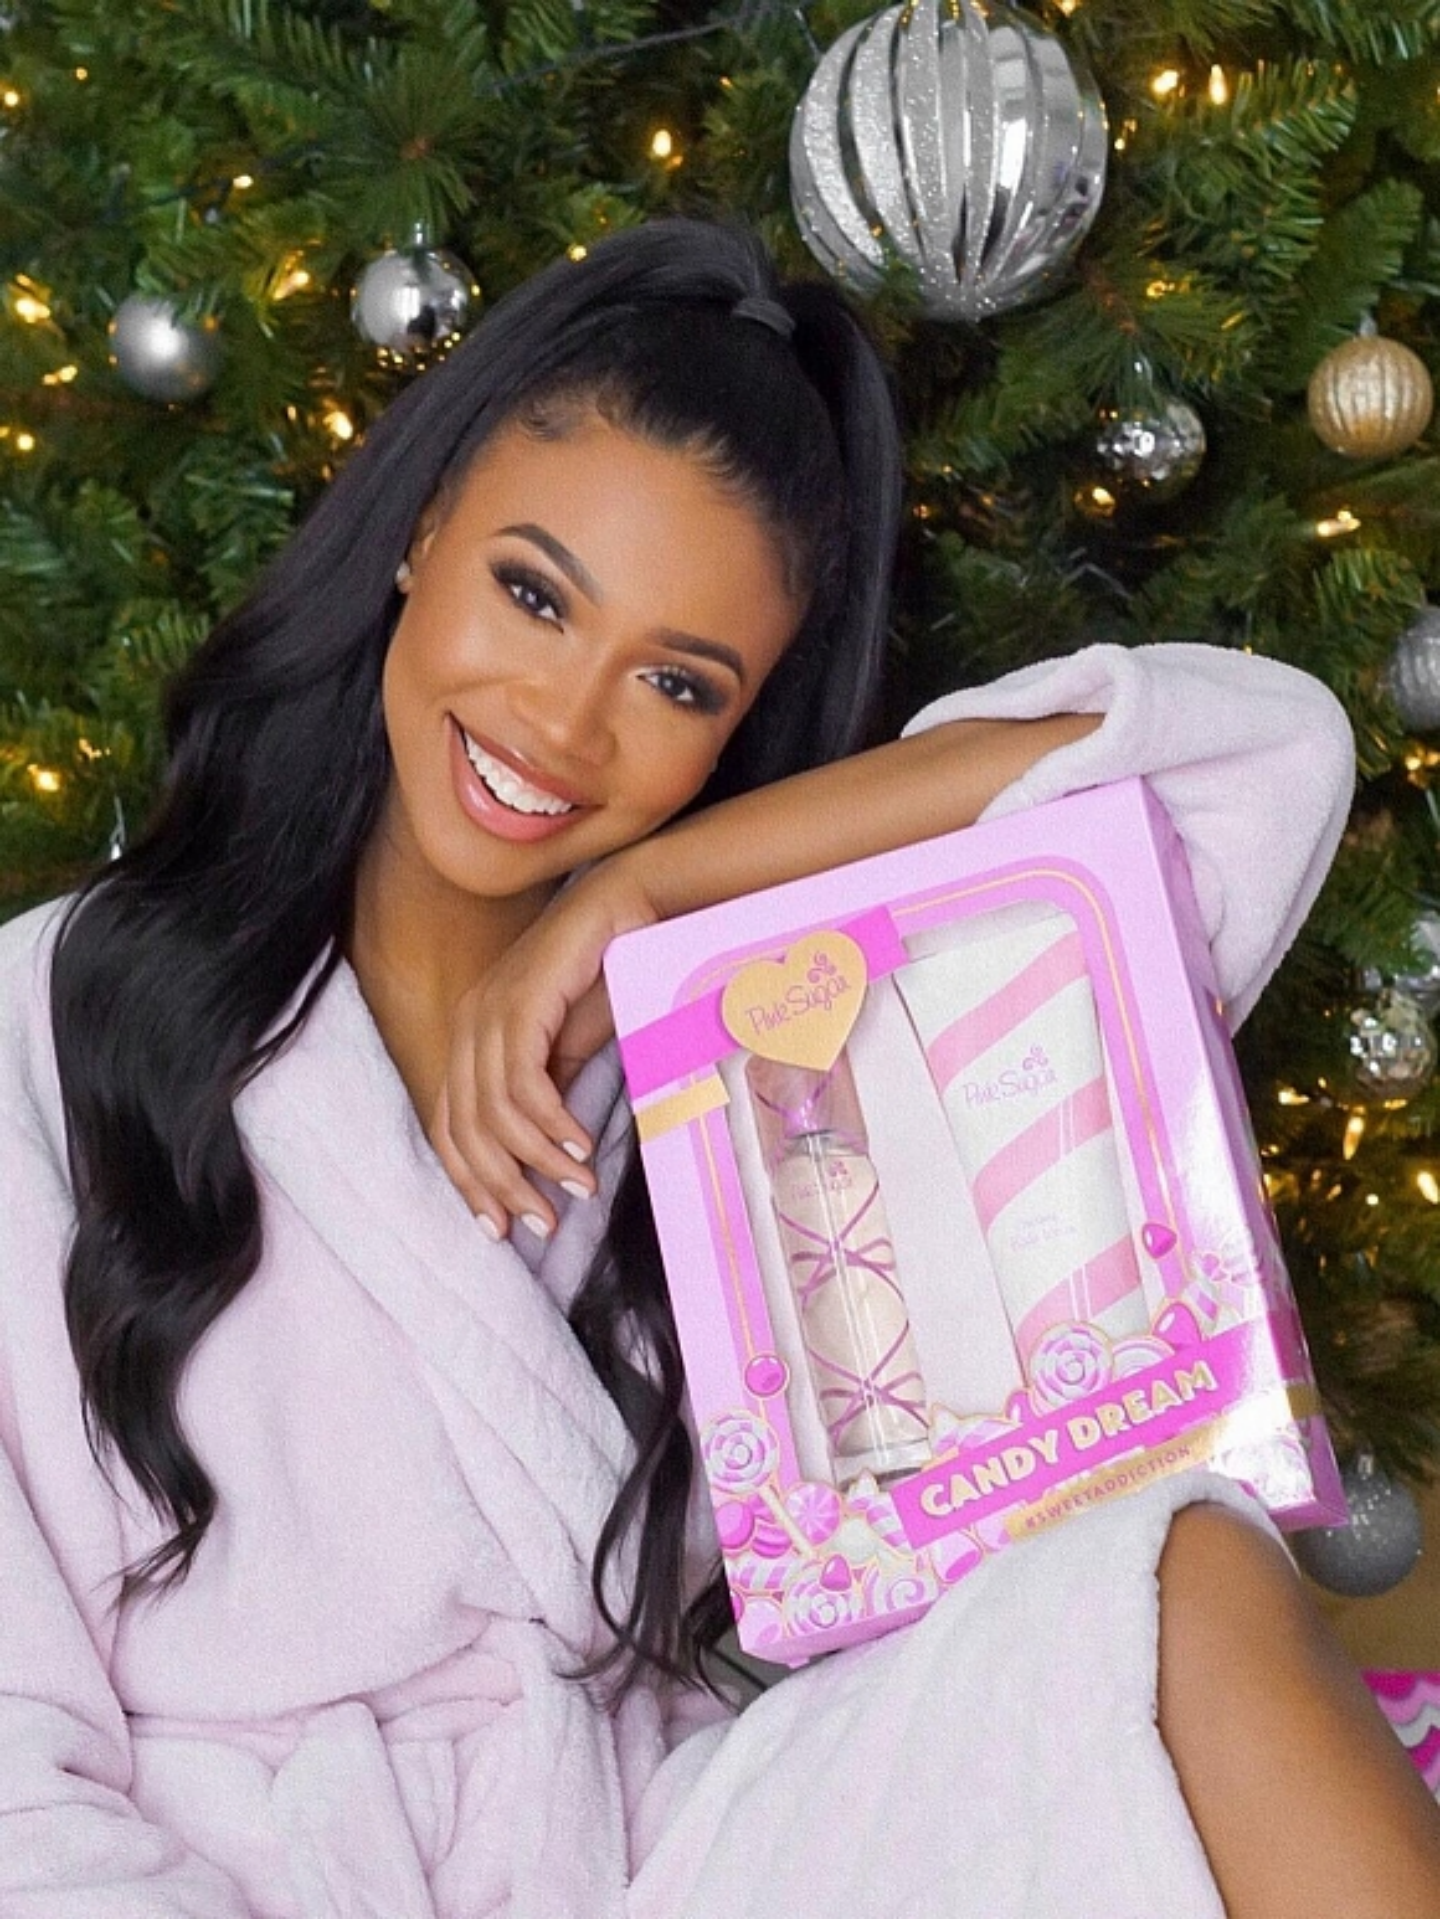
Step by step guide for creating high sleek ponytail with hair extensions
- Wash Your Hair and Apply Coconut Oil
Make sure your hair is clean. Wait for about 10 minutes so that edges start to air dry, not trying to detangle your hair but make sure there are no snags or bumps. Moisturize your natural hair with coconut oil for appropriate dosage, put it lightly all over your hair from the roots.
- Comb Your Natural Hair to Sleek
Comb your hair out and make sure that coconut has been into your hair when it’s as sleek as you want. Using some heat to make sure that your hair is protected and you are doing hairstyle in a way as healthy as possible.
- Apply Some Heat Protectant and Blow Dry Your Hair
Add the heat protectant on your natural hair and fully blow dry your hair with hair drier. Make sure your hair is fully blown out and straighten you hair a little bit for a sleek look. If you like,you could repeat this step.
- Straighten Your Natural 4c Hair
To flat iron your hair, part it into small sections, set the flat iron to the right temperature (120°C-150°C is recommended for natural 4C hair), and make 1 to 2 passes.
- It's Time to Put Your Hair Into One
Brush your hair all up in one and put it into a high small ponytail. Put the freezing spray again and go back in with the blow dryer. Dry the area where you put it to keep your hair stay and lay properly and flat. Wrap the ends of your hair into a bun and secure it with a rubber band.
- Attach Your Hair Extensions to Create a High Ponytail
Tie down your edges with stain scarf and attach the ponytail into your hair. Place it in the center and make sure the ponytail is in place. String it and pull out until you feel that the ponytail is secure. After installing it ,take a piece of hair extension out and wrap your hair around with it.
- Spray With Hairspray to Keep Your Sleek Ponytail All Day
No you finish a perfect high sleek blow out ponytail,remember to spray some cream of nature finishing oil and rub it in the palm of your hand and just put that on the top of your hair.
3. High side swoop ponytail (BARBBIE PONYTAIL)
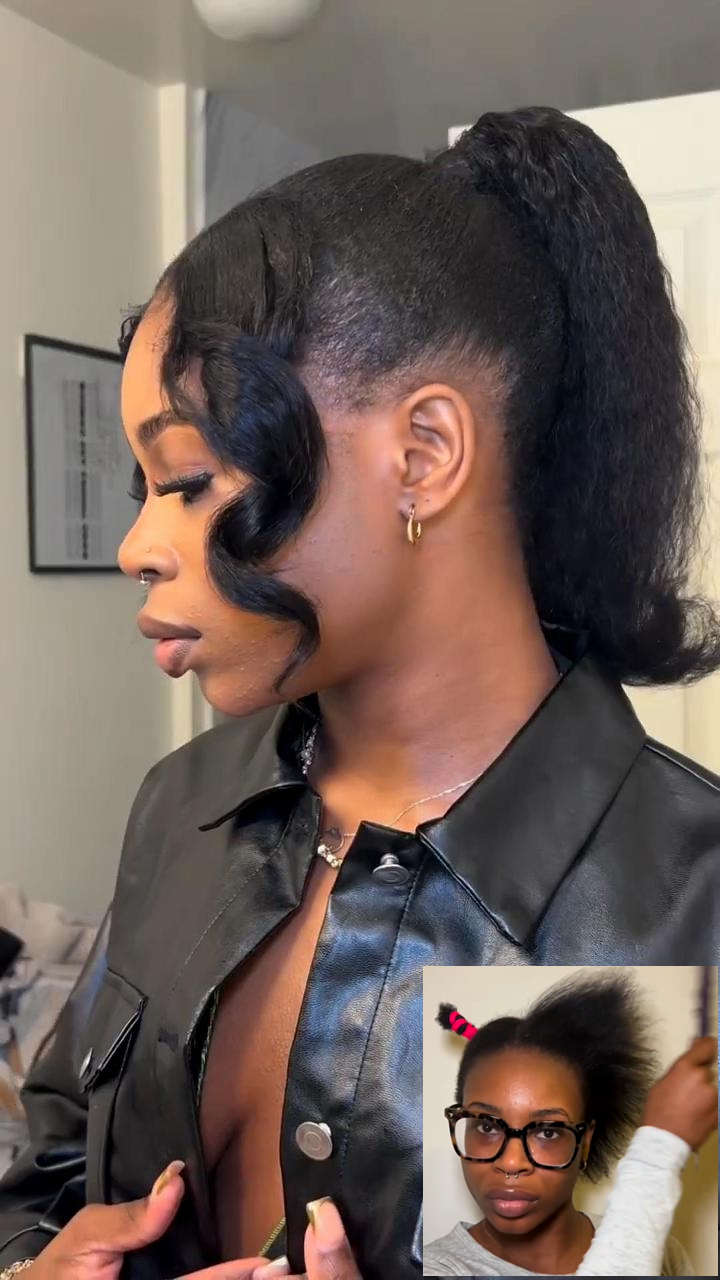
Peparation for making high side swoop ponytail
- Hair brush
- Tail comb
- Rubber bands
- Hair gel
- Drawstring ponytail
- kinky straight clip ins
- Edge brush
- Bobby pins
STEP BY STEP GUIDE TO CREATE A SIDE SWOOP PONYTAIL
- Form the Front Side Part
Apply some gel to the part in the front section of your hair and comb the gel through to make the part neater. Make sure there’s no hair get in the way and then tie it off with a rubber band and put it to the side.
- Form the Ponytail Part
Comb the rest part of your hair into a high bun and tie it with a rubber band, clamp the ponytail hair extension into your hair, and make sure that it’s in the right place and not too tight. Clip it from the front side of the bun and pull the string tightly until it’s secure enough. Take a piece of hair from the drawstring ponytail and wrap it around to make it look natural.
- Turn To the Front Part
Smooth all of your ponytail out with your brush. Turn to the section you tied off, untie the part,remove the rubber and make sure there’s no knots or tangles again. Apply some gel all over the section and use comb to spread the gel out evenly. Apply some edge control with edge brush to the front section of the hair. Comb your hair through to lay it down and start to form the swoop into the shape you want.
- Ending Part Comes
Take some bobby pins and pin them to the back of your head in a way you think it comfortable. Tie the last strand of hair with rubber and connect it to the ponytail and then smooth everything outwards with hair brush.
4. High bubble ponytail
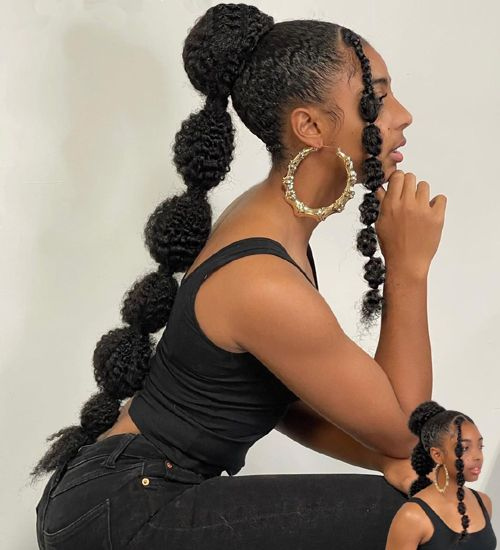
Preparation for high bubble ponytail
- Hair serum
- Blow-dryer
- Edge booster
- Brush
- Hair gel
- Scrunchie/ rubber brands
- 4c hair clip ins
- Wrapping strips
- Spraying product
STEP GUIDE FOR A BUBBLE PONYTAIL
- Clean and Moisturize Your Natural Hair
Wash your hair before and moisturize your natural hair with your favorite serum or hair lotion. Blow it dry and Part your hair into small pieces.
- Flatten Your Natural Hair
Flatten them to make your hair completely straight from root to end with comb at first. Then spray all over your hair and use your hair comb to smooth everything out. Blow your hair into stiff with blow-dryer.
- Apply Edge Booster and Gel to Your Hair
Apply edge booster all around your edges and comb your hair again to make it as sleek as possible. Then apply the gel you like as little as possible and brush your hair to smooth again.
- Tie All Your Natural Hair up High Into a Short Pony
Use a scrunchie to tie all your hair up, twist the hair around to make a bun and use another scrunchie to tie. Wrap your edges around with your wrapping strips.
- Now to Install the Yaki Drawstring Ponytail and Make Bubbles.
Attach first clip right in between your natural hair and the bun/braids you’ve just formed. Lock in the clip from behind. Pull the string and tighten the ponytail. Then attach all tied the elastic band around the ponytail as how full you want your balloon to look.
Take rubber brands and use your finger to stretch the hair to form little bubbles. Fluff them out a little bit, put your ponytail forward and do that again until you get the size you want.
5. High half up half down ponytail
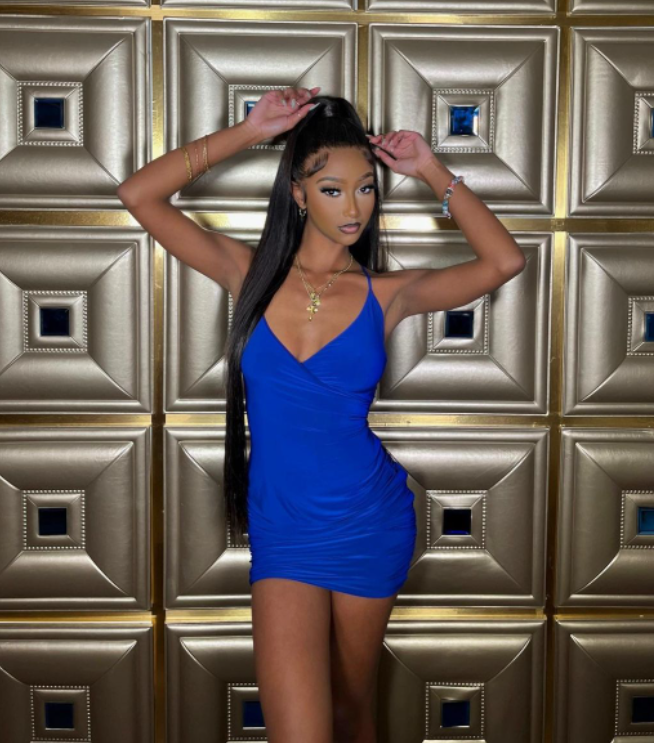
Preparation for high half up half down ponytail
- Hairspray
- Brush
- Glue
- Freeze
- Blow dryer
STEP GUIDE FOR HALF UP HALF DOWN PONYTAIL
- Make Your Natural Hair Sleek
Spray throughout the hair, brush it though and flatten your natural hair as sleek as possible.
- Part Your Natural Hair
Divide your hair into 2 parts, and move the top portion out the way. Take a small slither out and part it off from the back. Leave another part out to cover up tracks and get the back part braided up. If you’d like sleek style, you could go ahead to install coarse kinky blow out clip in hair extensions for the under part.
- Add the Hair Extensions in the Back Side
Apply protective glue to your braids all over the back of your hair. Cover the back part of your hair with wig cap and blow out your hair to make sure the glue is dried out. Measuring out the tracks and lay them on your head. Put the glue on the track and spray it with spritz. Put the tracks ear to ear until you get to the top of your ear.
- Turn To the Front Side
Untie the front part of your hair and flatten it with heat protecting. Put your hair up in a high small ponytail and spray it with your freeze and blow dry it. Use rubber bands to warp the part around and extend your ponytail as long as you need. Then braid it. Wrap your ponytail with another wig cap and seal it with some glue.
- Attach the Ponytail Into Your Hair
If you choose drawstring ponytail, then just wear it and pull the string to make the ponytail secure. If you’d like microlinks hair extensions, then wrap your hair around with it and fix it on your ponytail.
6. Jumbo/High braided ponytail
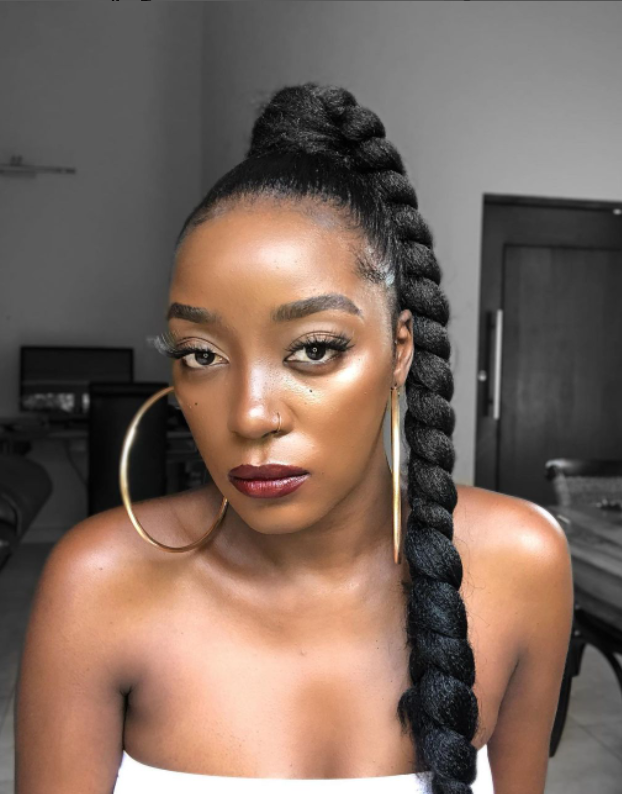
Jumbo braids part your hair into bigger sections, allowing the braiding process to take on quickly. This hairstyle makes the most of human hair braiding hair, making each plait thicker overall. You can take a break from doing your own hair, and set aside some extra time. This hairstyle holds on up to two weeks.
PREPARATION FOR BUBBLE PONYTAIL
- Hair gel
- Hair brush
- Eco styling gel
- Edge control
- Blow dryer
- Drawstring ponytail
- Braiding human hair
- Bobby pins
- wrap strips
SIMPLE GUIDE FOR JUMBO BRAIDS/HIGH BRAIDED PONYTAIL
START WITH YOUR DAMP HAIR
Take eco styling gel to sleek your hair and brush it, making your hair as smooth as possible first. Take hair ties to make your natural hair into a small ponytail and wrap your hair up into a bun, then get it out of your way.
WRAP YOUR FRONT HAIR
Brush your edges with edge control and blow your hair cool. Then wrap your front hair with wrap strips.
ATTACH BRAIDING HUMAN HAIR EXTENSIONS OR DRAWSTRING PONYTAIL TO YOUR NATURAL HAIR
Take the drawstring ponytail and blend it with your natural hair and add 1-2 packs of human hair braiding hair. Take out a piece of hair from the ponytail to cover the the base at the end. Split the hair extensions into 3 sections and brush every part throughout.
NOW LET'S START BRAIDING!
Add some gel on each part and then start to braid your hair in front or back as you like. Cut the excess hair when you finish braiding. Then add some gel to the piece of hair you left before, smooth it and wrap the hair around the base of the braids to make the braids seamless. Finally place the bobby pins at the end where you feel comfortable.
7. High box braids ponytail
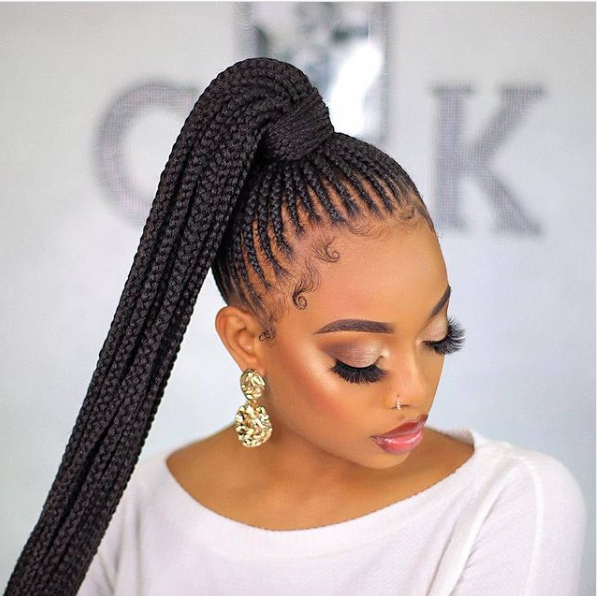
Box braids, also known as Poetic Justice braids, are single three-strand plaits made from small, sectioned-off parts, or boxes. Anyone with any texture can have box braids on condition that his hair is long enough to create a braid. It requires time to braid but can keep for a long time.
Box braids last a total of four to six weeks without a touch up, provided that maintenance is kept up, including trimming away extension flyaways, keeping edges smooth and hydrated, and ensuring your scalp is healthy in tip-top shape.
Preparation for high box braids ponytail
- smoothing products
- Moisturizing oil
- Hair brush
- Tail comb
- Braiding Human hair
SIMPLE GUIDE FOR BOX BRAIDS PONYTAIL
- Wash you hair and dry it out before you start and moisturize your hair with healthy products you like in the braids
- Divide your natural hair into front and back half and tie up the back half to keep it out of the way
- Divide your front hair into two parts straight from the middle
- Tie up one side and split the loose part in half which make two rows of box braids
- Split the bottom row down the middle into two braids
- Apply some smoothing products to your roots and brush it to make sure there’s no lumps
- Band each section of hair together with rubber band and flatten it again.
- Take a piece of hair extension you’ve sectioned and fold it in half.
- Pull out a piece of hair from one side and bring it over to the middle.
- Line up the middle piece of braiding hair extensions with your hair and wrap the other two pieces around.
- Braid it to the bottom.
- Turn to another braid and repeat strand braid
- Move on to next row and slit it as you want for braiding and do the same on the other side.
- Part straight across for the back half and divide your hair in several rows and braid them as the number you like.
- Collect the braids of the backside and tie them up as the height you want.
8. High feed-in braids ponytail
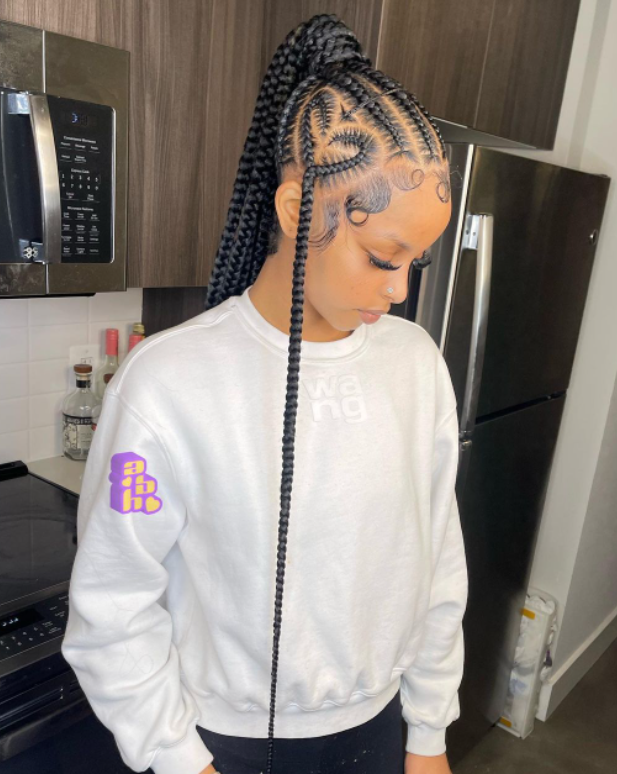
This braiding hairstyle can grow the size of your natural hair gradually in the way of“feeding-in” pieces to the main braid while remain the natural look at the hairline. And that’s why it is called feed in braids.
According to adding hair to your braids, your hair is made fuller, prevented from frizz, and be added length depending on your style. Feed-in braids do not start braiding at the perimeter of the hair but an inch or so backward placing less strain on the edges.
Feed-in braids are one of the least long-lasting protective braid styles lasting for 2 weeks.
SIMPLE GUIDE FOR HIGH FEED-IN BRAIDS PONYTAIL
- Wash your hair and blow it out
- Part out the center of your hair and separate the hair as the middle where your ponytail will be.
- Divide your hair into four equal sections around the middle ponytail
- Moisturize your hair with some jam or gel and take a packet of hair extensions.
- Braid the hair extensions with your natural hair in the middle.
- Separate your left-front part of natural hair into 2 strips and braid each strip with a piece of hair extensions. You can extend it at the end with more pieces of weave hair extensions.
- Do the same braiding with another strip as well as the other three sections you’ve left.
- Smooth your hair with mousses or add some oil to your scalp.
- Wrap all the braids around with one piece of them and tie them up tightly.
9. High cornrow braided ponytail
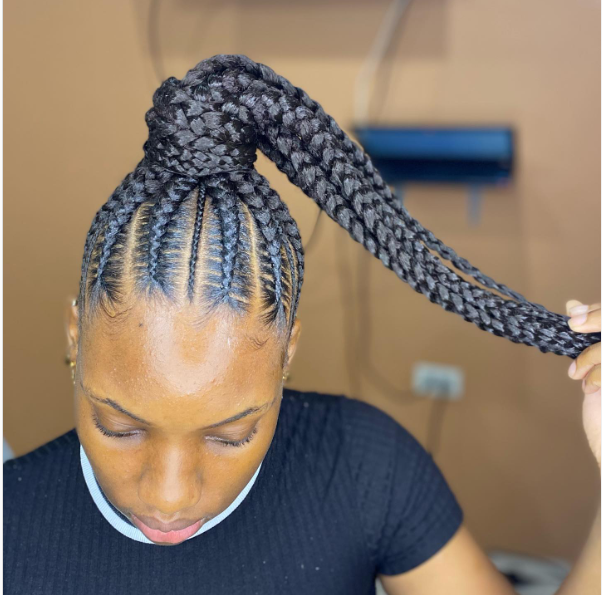
Cornrows is a traditional style of braids in which the hair is braided extremely close to the scalp, using an underhand, upward motion to make a continuous, raised row.
Cornrows originated in Africa and the Caribbean-their very name indicates agriculture, planting, and labor.
Cornrows on women date back to at least 3000 B.C. and as far back as the nineteenth century for men, particularly in Ethiopia. Warriors and kings were identified by their braided hairstyles.
With cornrows, your braids go down for a tighter, flatter effect against the scalp.
Cornrow braids hold up two to eight weeks.
SIMPLE GUIDE FOR HIGH CORNROW BRAIDS PONYTAIL
- Separate your natural hair into 3 parts:front, back and middle
- Twist the middle part hair up and save it for later braiding
- Divide the back part of your hair into several equal little strands in straight rows and tie each strand up.
- Braid the first strand upwards and add some human hair braiding hair extensions to blend it with your natural hair when braiding
- Continue to braid other rows that you’ve part out
- Separate the front part of your hair in the same way and braid each row downwards.
- Cornrow the middle part of your hair with interlocking tool in the way you like and make sure it’s as small as possible
- Sew the middle braid up and crochet your braiding hair extension pieces around
- Make sure your crochets tight and covered when you put up your ponytail
- Tie up all the braids with rubber band, take a few of the braids and wrap the ponytail around.
10. High faux locs ponytail
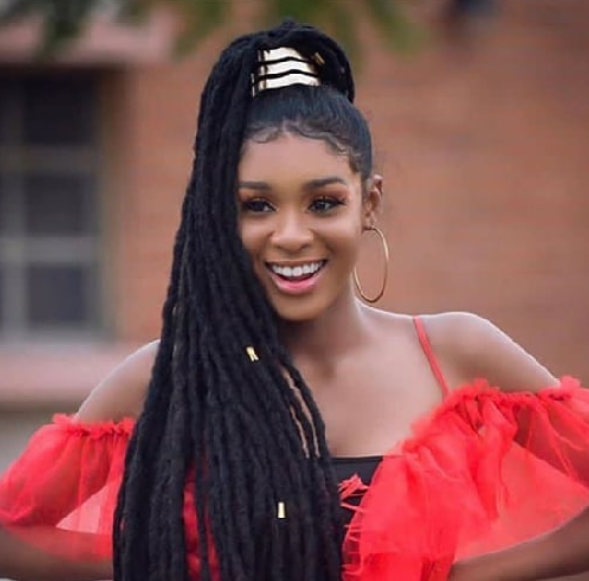
Faux locs hairstyle is created by using human or synthetic hair and yarn. The best hair for individual crochet faux locs is definitely synthetic hair, such as Marley or Kanekalon hair.
Faux locs are no more damaging than any other hairstyle that adds hair to your own hair with too much tension on your scalp. You cannot neglect protecting your own hair and assume that no further maintenance is necessary. Your own hair must still be cleansed, moisturized, and conditioned.
High Faux locs ponytail can last for four to six weeks.
SIMPLE GUIDE FOR HIGH FAUX LOCS PONYTAIL
- Comb your natural hair out and detangle it.
- Tie your natural hair all up and take your edge control all over your head
- Smooth it in around the perimeter of your head.
- Dip some water with your brush and smooth all of the edge control back in for high ponytail.
- Spray some water to wet your ponytail and take some cream to make the bun as small as possible
- Clip the drawstring ponytail around your bun, hook inside clips in and tighten it with the strings
Check out Curlsqueen's new arrivals and other trend blogs to find the perfect human hair extensions for all your styling needs.
Guide To Choosing The Best Clip-In Hair Extensions For Short Hair And Easy Care Tips
And if you are unsure about which texture to take, feel free to email our CSR (support@curlsqueen.com) with photos of your natural hair. We will provide you with our recommendations:)


